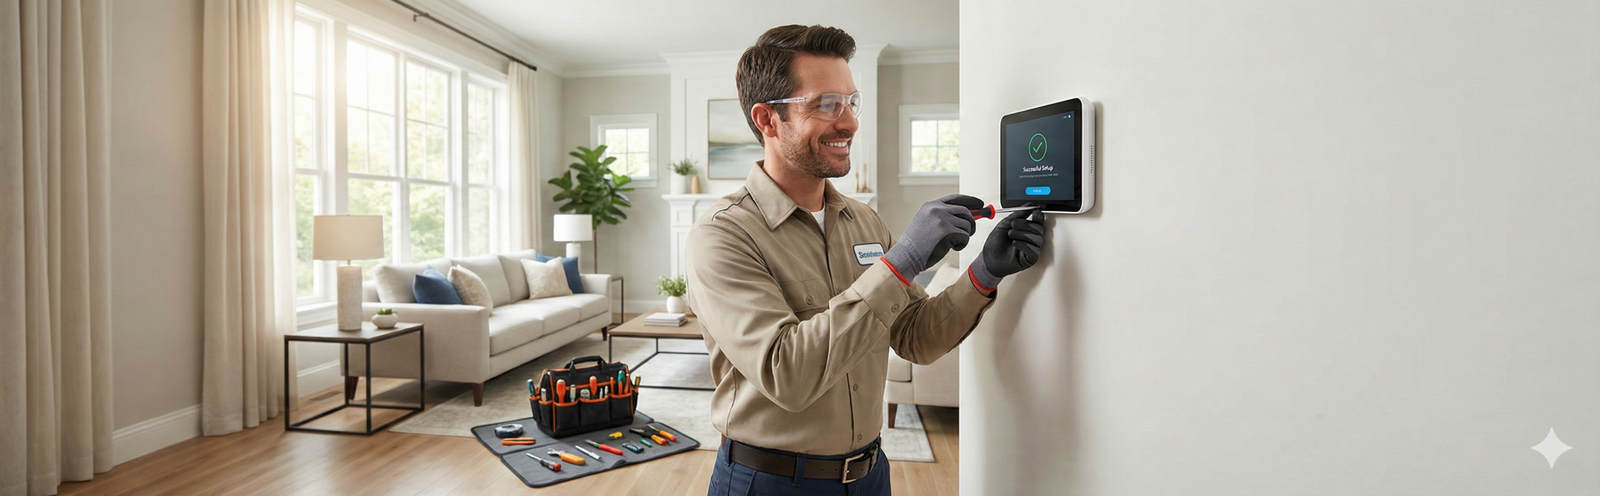
Installing a smart thermostat sounds simple because the product is marketed like a quick upgrade: pop off the old thermostat, connect a few wires, open the app, and enjoy a smarter home. In real houses, the experience is more uneven. Some installs really are simple. Others get derailed by missing power, confusing wire labels, line-voltage vs low-voltage confusion, weak Wi-Fi near the hallway, or a schedule that looks smart on day one but gets abandoned by week two.
That gap between installation and long-term usefulness is where most homeowners either love the upgrade or quietly stop using it. A smart thermostat is only “worth it” when three things line up at the same time: your HVAC system is actually compatible, the installation is clean and safe, and the setup reflects how people in the home really live. Miss one of those and the thermostat often ends up stuck in permanent Hold mode, constantly overridden, or blamed for comfort problems that were really caused by system mismatch.
This guide is built around that real-world problem. Instead of pretending every home has the same wiring or every buyer wants the same feature stack, this walkthrough focuses on practical decisions: how to check compatibility before you touch a screwdriver, how to avoid the most common installation mistakes, how to set up the thermostat so it feels useful every day, and when it makes more sense to call an HVAC pro instead of forcing a DIY install.
Quick answer
A smart thermostat is easiest to recommend when you have a standard low-voltage HVAC system, stable Wi-Fi, and a realistic plan for how the schedule will be used after installation. The safest DIY path is to verify compatibility first, shut off power at the breaker, photograph and label existing wires, complete the app-guided setup carefully, and keep the first schedule simple.
If your wiring does not match the setup guide, your thermostat location has weak Wi-Fi, your system is unusual, or your home uses electric baseboards or other non-standard heating, slow down and verify the system type before buying or installing anything. That one pause prevents most expensive mistakes.
Why smart thermostats fail in real life
Most disappointment starts before the thermostat is even mounted. Buyers see automation, app control, and energy savings, but they do not always realize that thermostats sit at the intersection of four variables that can each break the experience: the HVAC system, the home’s wiring, the wireless network, and the people who live there.
The first failure point is compatibility. Not every system plays nicely with every thermostat, and “thermostat compatibility” is not a boring technical footnote. It is the difference between a clean install and a device that reboots, drops connection, or never controls the equipment correctly. The second failure point is power. Some homes have a proper common wire, some need an approved accessory, and some should never be treated as a casual low-voltage swap. The third failure point is setup behavior. A schedule that is too complex gets ignored. A household with three people changing temperatures all day rarely benefits from a thermostat configured for one person’s routine.
The fourth failure point is expectations. A thermostat cannot fix leaky windows, poor insulation, unbalanced ductwork, a bedroom with terrible airflow, or a furnace that already struggles to maintain temperature. It can improve convenience, consistency, and control. It can sometimes improve energy use by making the right behaviors easier to keep. But it is not magic, and that matters because buyers who expect magic are usually the fastest to return the product.
The real-life pattern
The thermostat feels valuable when it solves small recurring moments: leaving home and dropping the temperature in one tap, sleeping cooler without remembering to adjust the dial, getting back from a trip to a comfortable house, or stopping hallway temperature from dictating how every bedroom feels.
It feels disappointing when the install is stressful, the schedule is overbuilt, or the household never agrees on how the system should run.
The compatibility-first framework to use before you buy or install
If you only remember one part of this guide, make it this framework. Most bad thermostat experiences are not caused by “bad products.” They are caused by buyers starting with model hype instead of home fit. Use these checks in order.
| Check first | What to confirm | Why it matters | DIY or pro? |
|---|---|---|---|
| System type | Standard low-voltage forced air, heat pump, boiler, or something less common | Different systems have different wiring expectations and support levels | DIY is more realistic on standard low-voltage systems |
| Voltage type | Low-voltage thermostat wiring vs line-voltage electric heat | Buying the wrong type is one of the fastest ways to waste money | Call a pro if you are unsure |
| Power path | Whether the system has a usable C-wire (common wire) or needs an approved accessory | Power problems cause some of the most frustrating installs | DIY if the guide clearly matches your wiring, otherwise stop |
| Wi-Fi conditions | Reliable signal at the thermostat location and a simple network setup, ideally with a stable 2.4 GHz path if your chosen thermostat expects it | A weak or fussy network makes a “smart” thermostat feel broken | DIY if signal is solid; fix networking first if it is not |
| Household behavior | Who adjusts temperature, when the house is empty, and how often plans change | The best thermostat setup is the one people will actually keep using | Always decide this before building schedules |
Once those checks look good, move on to model selection. If you still need help narrowing down models, our Best Smart Thermostats for Energy Savings guide is the right next stop because it handles product selection separately from installation. That separation matters. A buying guide should help you choose the right model. An installation guide should help you avoid costly setup mistakes.
The practical installation flow that avoids most headaches
This is the sequence that works best in real homes because it reduces guesswork. It is not the shortest possible flow. It is the safest and most repeatable one.
1) Start by making the house comfortable before you shut the system down
If it is hot outside, cool the home before you begin. If it is cold, warm it up first. That sounds minor, but it lowers the pressure to rush through the install because family members are uncomfortable. People make more wiring mistakes when they feel like they need the system back on immediately.
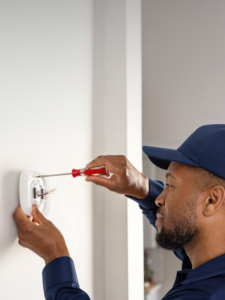
2) Turn off HVAC power at the breaker, then confirm it is really off
Do not rely on the thermostat screen going blank. Turn off power at the breaker or the appropriate disconnect, and verify the fan or system will not start. This is the step that separates a careful DIY job from a reckless one. Smart thermostat installs are not worth rushing.
3) Remove the old faceplate and photograph everything before disconnecting wires
Take more than one photo. Get a straight-on shot of the terminals. Get another shot with labels visible. If there are multiple wire colors close together, get a close-up. The photo is your backup when an app asks where each wire came from and your memory suddenly becomes less reliable than you expected.
4) Label each wire by terminal, not by color
Wire color helps, but terminal labels matter more. Colors are not always consistent across homes. Label by the existing terminal designation first. This is one reason app-guided installation is so helpful: good apps walk you through terminals, not vague guesses.
5) Check whether your wall opening and mounting area need cleanup
Before you mount the new base, see whether the paint line, drywall condition, or screw spacing will leave the install looking rough. Sometimes the “technical” part is easy and the annoying part is cosmetic. A trim plate can save time and make the final result look intentional instead of patched together.
6) Deal with power honestly instead of forcing the install
The most common snag is power. Some systems provide what the thermostat needs cleanly; some need an approved accessory; some are a sign that you should pause and confirm compatibility. If the brand’s setup flow no longer matches what you see on the wall or at the control board, stop and verify before continuing. This is exactly where homeowners get into trouble by assuming every smart thermostat is a universal swap.
A good rule: if you are no longer certain what each wire is doing, that uncertainty is expensive. At that point, calling a professional is usually cheaper than replacing a damaged board or returning the thermostat after a frustrating weekend.
7) Mount the new base carefully and avoid over-tightening
Make the base level enough that the thermostat looks straight, but do not turn this into a museum project. The real goal is secure mounting and reliable terminal contact. Over-tightened screws can crack plastic or distort the base, which creates a sloppy final fit.
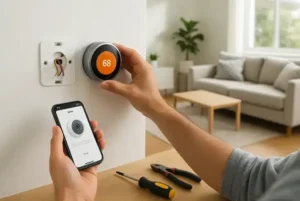
8) Restore power and complete the app setup without skipping the boring questions
The setup screens that ask about equipment type, fan behavior, heating stages, or schedule preference are not filler. They are where the thermostat learns what kind of home it lives in. Guessing here can make the system feel erratic later. Take the extra few minutes and answer carefully.
9) Connect Wi-Fi at the thermostat location, not just in the next room
Many people test their network on the couch and assume the hallway wall where the thermostat lives will behave the same way. It often does not. Thick walls, distance from the router, and messy dual-band settings can all create a setup that technically connects but does not feel reliable. Many smart thermostats are happiest on a stable 2.4 GHz setup during installation, so solve the network reality first instead of blaming automation features later.
10) Test heat, cool, fan, and app control before declaring victory
Do not stop at “the screen turned on.” Run a basic function test. Confirm the app talks to the thermostat. Confirm the thermostat actually calls for the expected mode. Confirm the household member who is most likely to use it can open the app and understand the controls. A thermostat is not fully installed until the person using it can operate it without confusion.
The setup step that determines whether you will love it or ignore it
Most smart thermostats are abandoned for behavioral reasons, not because the hardware is terrible. People overbuild the schedule, turn on every feature at once, and then get annoyed when the home does not feel predictable. The sticky approach is simpler.
Use the “simple first week” setup
- Set only the temperatures you truly care about first: wake, away, return, and sleep.
- Keep the first schedule broad instead of hyper-specific.
- Decide who controls the thermostat so you do not create a household tug-of-war.
- Wait a week before adding geofencing, room-sensor prioritization, or more advanced automations.
- Leave yourself one obvious manual override path that is easy to undo.
This is also the best moment to connect the install page to the rest of the thermostat cluster. If your main goal is lower utility costs, read How Smart Thermostats Reduce Energy Bills after the install is finished. That article covers the buying and usage logic behind savings, while this page focuses on the installation and adoption side.
Who benefits most from a smart thermostat
The same thermostat can feel transformative in one home and unnecessary in another. Fit depends less on marketing and more on routine.
People who leave home often or keep irregular hours
This group gets some of the clearest convenience value because plans change. A smart thermostat makes “we’re gone longer than expected” or “I want the house comfortable before I get back” a low-effort action instead of a forgotten task.
Families with recurring schedules
Families often care less about fancy automation and more about predictable comfort. A thermostat can reduce daily arguments when the wake, school, work, and bedtime pattern is consistent. The key is agreeing on the comfort range in advance. Smart control does not fix family disagreement by itself.
Small apartments and smaller homes
In smaller spaces, the biggest win is usually convenience rather than advanced zoning. If you are also building out a simpler connected home, our smart home setup guide for small homes and best smart home devices for beginners can help you avoid buying tech that creates clutter instead of convenience.
Comfort-focused households with uneven room temperatures
If the complaint in your home is not cost but “one room always feels wrong,” then the thermostat decision is really about comfort strategy. In those homes, placement, sensors, and realistic expectations matter more than app aesthetics.
Who should skip the DIY route
DIY installation is not a badge of honor. It is just the right choice for some homes and the wrong choice for others. Skip DIY and bring in a professional when any of the following is true:
- You cannot confidently identify whether the system is standard low-voltage equipment.
- The wire labels do not match what the app or manual expects.
- The thermostat controls a more complex system and you are unsure how it is staged or configured.
- The wall wiring looks modified, messy, or previously “creative.”
- Your home has line-voltage heat, non-standard electric heating, or another setup that should not be guessed through.
- The thermostat location has poor Wi-Fi and you are trying to solve network issues and HVAC issues at the same time.
- You already feel tempted to “just try something” with wiring.
The best definition of a successful DIY install is not “I got it working eventually.” It is “I installed it safely, understood what I was doing, and trust that it is configured correctly.”
Common mistakes that waste time, money, or patience
| Mistake | What it causes | Better move |
|---|---|---|
| Buying before checking compatibility | Returns, confusion, wasted install time | Check system type, power path, and location conditions first |
| Relying on wire colors instead of terminal labels | Miswiring and stressful troubleshooting | Photograph and label each wire before disconnecting anything |
| Skipping the breaker shutdown | Risk, damage, and a much more expensive “upgrade” | Power down fully and verify the system is off |
| Building a complicated schedule on day one | Confusion, overrides, permanent Hold mode | Start with a simple schedule and refine later |
| Expecting the thermostat to fix comfort problems caused by the house | Disappointment and blame in the wrong place | Treat insulation, airflow, and duct issues as separate problems |
| Forgetting about the Wi-Fi environment | A “smart” thermostat that feels unreliable | Confirm network quality at the thermostat wall, not just near the router |
Scenario-based recommendations: what kind of smart thermostat setup fits your home?
This is where buyers usually get stuck. They are not really asking, “Which thermostat is best?” They are asking, “Which thermostat style will create the fewest headaches in my house?” That is a better question.
| Your situation | What to prioritize | What to avoid |
|---|---|---|
| You want the easiest learning curve | Clear app guidance, simple scheduling, and strong setup support | Buying the “most advanced” model just because it is popular |
| You care more about room comfort than automation flair | Good sensor strategy and realistic placement expectations | Assuming the hallway temperature should represent the whole house |
| You want a budget-friendly upgrade | Compatibility first, then app simplicity and stable network setup | Chasing the cheapest option without checking wiring needs |
| You have electric baseboards or other line-voltage heating | A thermostat designed specifically for that heating type | Assuming a standard low-voltage smart thermostat will work |
| You want lower bills without becoming a home-automation hobbyist | A stable schedule, sensible away behavior, and easy manual control | Complex routines you will never maintain |
For exact model-level picks, jump to the dedicated roundup rather than turning this install guide into a shopping page: Best Smart Thermostats for Energy Savings. This is also the right place to compare which brands make more sense for beginners, budget buyers, comfort-first households, and homes with unusual heating setups.
A practical shortlist mindset
Brand names matter less than fit, but there are still useful shopping patterns. Buyers who want a guided, less intimidating setup usually gravitate toward brands with stronger app-led installation. Buyers who care most about comfort in occupied rooms tend to focus on sensor ecosystems. Buyers who want the most affordable upgrade tend to care about installation clarity and network reliability more than premium automation. And homes with electric baseboard heat should stay in that lane from the beginning instead of pretending every thermostat belongs in the same comparison.
What a realistic first month looks like after installation
The best thermostat owners do not become amateur energy analysts. They build one low-friction routine and then leave it alone long enough to judge it fairly.
Week 1: Learn the basics, do not optimize everything
Use wake and sleep temperatures. Confirm manual adjustment is easy. Notice whether the home feels more comfortable or whether you are still correcting the thermostat constantly. If you are still adjusting it all day, your schedule may be too rigid or the comfort issue may be coming from the house rather than the thermostat.
Week 2: Add away behavior
Once the first schedule feels predictable, add the away setup that matches your actual routine. This is a better sequence than turning on every automation feature immediately, because you can tell what changed and whether it helped.
Week 3: Refine comfort, not just efficiency
A thermostat that saves energy but makes bedtime miserable is not a smart upgrade. Refine the temperatures so the home still feels good. Comfort is what makes efficient behavior sustainable.
Week 4: Decide whether you even need advanced features
At this point, you will know whether geofencing, room sensors, or more detailed routines are actually solving a real problem or just adding dashboard clutter. Many buyers are better off stopping at a simple schedule plus away control.
If you are trying to build a more coordinated energy-saving setup, it can also make sense to pair thermostat habits with a few simpler devices. Our guide to smart plugs and lights that help lower energy bills shows why the thermostat should be part of a broader behavior system, not a standalone miracle purchase.
Routine maintenance and long-term sanity checks
Smart thermostats do not demand much maintenance, but the home around them does. If performance starts feeling off months later, do not immediately assume the thermostat is to blame.
- Check HVAC filter condition on schedule so airflow issues do not get mistaken for thermostat issues.
- Review your schedule when seasons change instead of keeping a summer routine forever.
- Update app permissions or household access when family routines change.
- Recheck Wi-Fi quality if the router location changes or the network gets reconfigured.
- Use comfort complaints as clues. If one room is always wrong, that may be a placement or airflow issue, not a “bad thermostat” problem.
This is also why thermostat content should connect to broader home-comfort education instead of living in isolation. A buyer who is really solving indoor comfort may need thermostat help, better HVAC habits, or another environmental fix entirely. The right next article depends on the real problem, not the trendiest gadget.
When a smart thermostat is the wrong upgrade
Not every home should start with a thermostat. Sometimes that is the right answer, even on an affiliate-driven internet where every problem is treated like a shopping opportunity. If your home already has a programmable thermostat that the household actually uses correctly, a smart replacement may be more about convenience than meaningful improvement. That can still be worth it, but it is different from a must-do upgrade.
A smart thermostat is also a weak first move when the comfort problem is clearly elsewhere. If the upstairs bakes in summer, one room gets almost no airflow, the furnace short-cycles, the windows leak, or humidity is the real issue, the thermostat may only improve control at the edges. It does not replace airflow balancing, insulation work, filtration improvements, humidity control, or HVAC service. In those homes, replacing the thermostat first can create the illusion of action without solving the thing that actually annoys people.
It can also be the wrong upgrade for households that hate complexity. Some buyers truly do better with a simpler control interface and one routine they already understand. Smart devices create value when they remove friction. They create clutter when they add another app, another login, and another layer of settings that no one wants to manage. That is especially true in homes where multiple people touch the temperature but no one wants to “own” the setup.
Good reasons to wait before buying
- Your current thermostat already supports the schedule you need and people actually follow it.
- You have known airflow, insulation, humidity, or duct issues that matter more than app control.
- The thermostat location has poor connectivity and you are not planning to improve it.
- You still are not sure whether your heating setup is standard low-voltage equipment.
- You mainly want “energy savings,” but the household constantly overrides temperatures for comfort.
Smart thermostat vs programmable thermostat: what actually changes?
This comparison helps keep expectations realistic. A programmable thermostat can already handle basic scheduled setbacks. The smart thermostat advantage is not just that it can schedule temperatures. It is that it makes adjustment, remote control, and household follow-through easier. That is a meaningful difference, but only when those benefits fit the way you actually live.
| If you care about… | Programmable thermostat | Smart thermostat |
|---|---|---|
| Basic scheduled temperature changes | Usually enough | Also enough, but easier to edit and monitor |
| Remote control when plans change | Weak or unavailable | A major advantage when you are often away or unpredictable |
| Multi-person household convenience | Works if everyone accepts the same routine | Better when multiple people need occasional access or oversight |
| Learning curve | Often simpler | Can be easier or harder depending on app design and household comfort with tech |
| Connected-home integration | Limited | Useful when you want one system that is easier to manage over time |
The point is not that “smart” always wins. The point is that smart control is most valuable when your routine changes, your household needs remote access, or you want the thermostat to be part of a broader connected-home setup instead of an isolated wall control.
What a good install should feel like the day after
This is a useful gut-check because buyers often judge success the wrong way. A good install should not feel dramatic. It should feel calm. The thermostat should respond when asked, the app should make sense, and the home should feel just a little easier to manage. You should not feel like you adopted a part-time hobby just to change the bedroom temperature at night.
The morning after installation, ask these questions:
- Can every relevant person in the home understand the basic controls in under a minute?
- Can you switch modes and confirm the system responds as expected?
- Does the schedule reflect reality, or did you build the version of your life you wish you had?
- Do you know what to do when plans change and the house will be empty longer than expected?
- Do you trust the setup enough that you are not thinking about wiring mistakes anymore?
If the answer to most of those is yes, the install is working. If the answer is no, do not immediately buy more accessories. Simplify the setup first. The best thermostat routines feel invisible after a week.
FAQ
Can I install a smart thermostat myself?
Many homeowners can, especially on straightforward low-voltage systems with clear wiring and strong app guidance. But DIY only makes sense when you understand the system well enough to install it safely. Uncertainty about system type, wiring function, or voltage is a reason to stop and verify before continuing.
Do I always need a C-wire?
Not every install looks the same, and some systems use approved accessories or alternative power paths. The important point is not to assume. Verify what your chosen thermostat expects and whether your current setup can support it cleanly.
Will a smart thermostat lower my bills automatically?
Not automatically in every house. A thermostat helps most when it makes good habits easier to keep: reliable setbacks, better away control, and less wasted heating or cooling when no one is home. Savings still depend on your climate, schedule, insulation, HVAC efficiency, and how you use the system.
Are room sensors worth it?
They can be worth it when the main thermostat location does a poor job reflecting where people actually spend time. They are less useful when the home is small, the temperature is already fairly even, or the household does not want more setup complexity.
What if my thermostat connects to Wi-Fi but still feels unreliable?
Look at the environment, not just the thermostat. The signal at the wall may be weaker than expected, the network may be configured in a way the device dislikes, or the app permissions may not be set up cleanly. Smart-home frustration often comes from networking friction disguised as product failure.
Should renters install one?
Renters should be cautious. Permission, wiring, system ownership, and the ability to restore the original thermostat all matter. A smart thermostat is a better renter project when the landlord approves it and the original hardware can be reinstalled cleanly.
How long does installation usually take?
A clean, compatible install can be fairly quick. The real time sink is not always the mounting or wiring itself. It is the troubleshooting that follows when compatibility, power, or Wi-Fi was not checked carefully before the install started.
Final verdict
A smart thermostat is one of the most worthwhile smart-home upgrades when it is chosen and installed like a home-comfort tool instead of a gadget impulse buy. The right mindset is simple: verify compatibility first, respect the wiring, solve the network reality at the wall, and keep the first schedule boring enough to survive real life.
If you do that, the thermostat can become one of those rare smart-home purchases that earns its place every day instead of becoming expensive wall décor. And if you are still deciding which model category fits your home best, use this guide for the installation logic and then compare models in our thermostat roundup and our explainer on how smart thermostats reduce energy bills.